Caddy Reverse Proxy on Windows: A Comprehensive Guide
Learn to set up Caddy as a reverse proxy on Windows. This guide covers manual configuration, examples for Jellyfin and NextCloud, and running Caddy as a service. Perfect for Cloudflare or DuckDNS users managing multiple subdomains. Simplify your web server setup with Caddy!

Caddy is a powerful, easy-to-use web server with automatic HTTPS, making it an excellent choice for a reverse proxy. This guide will walk you through setting up Caddy as a reverse proxy on Windows, including configuration examples and how to run it as a Windows service.
Table of Contents
Running Caddy Manually
To run Caddy manually:
First Download Caddy
To run Caddy you need to create a file in the folder that you kept Caddy. Then you need to create a file named Caddyfile.
Run Caddy using the following command:
./caddy run --config Caddyfile
Open a command prompt and navigate to your Caddy directory:
cd C:\Tools\Caddy
Important: When running Caddy for the first time, you may see Windows security prompts. Make sure to accept both permissions.
Configuration Examples
Cloudflare Examples
Jellyfin
sub.domain.com {
    reverse_proxy 127.0.0.1:8096
    tls {
        dns cloudflare cloudflare-api
    }
}
NextCloud
files.domain.com {
    header Strict-Transport-Security "max-age=15552000; includeSubDomains; preload"
    redir /.well-known/carddav /remote.php/dav 301
    redir /.well-known/caldav /remote.php/dav 301
    reverse_proxy 127.0.0.1:9111
        header_up X-Real-IP 127.0.0.1
        header_up X-Forward-For 127.0.0.1
    tls {
        dns cloudflare cloudflare-api
    }
}
JFA-Go
jellyfin.domain.com {
    reverse_proxy /Users/ForgotPassword 192.168.0.111:8096 {
        header_up X-Forwarded-For 192.168.0.111
    }
    reverse_proxy /Users/ForgotPassword/Pin 192.168.0.111:8096 {
        header_up X-Forwarded-For 192.168.0.111
    }
    reverse_proxy 192.168.0.111:8096
    tls {
        dns cloudflare test-api-key
    }
}
jfa-go.domain.com {
    reverse_proxy 192.168.0.111:8056
    tls {
        dns cloudflare test-api-key
    }
}
DuckDNS Examples
Jellyfin
subdomain.duckdns.org {
    reverse_proxy 127.0.0.1:8096
    tls {
		dns duckdns duckdnstoken
	}
}
NextCloud
subdomain.duckdns.org {
    header Strict-Transport-Security "max-age=15552000; includeSubDomains; preload"
    redir /.well-known/carddav /remote.php/dav 301
    redir /.well-known/caldav /remote.php/dav 301
    reverse_proxy 127.0.0.1:9111
        header_up X-Real-IP 127.0.0.1
        header_up X-Forward-For 127.0.0.1
    tls {
		dns duckdns duckdnstoken
	}
}
JFA-Go
jellyfin.ducksdns.org {
    reverse_proxy /Users/ForgotPassword 192.168.0.111:8096 {
        header_up X-Forwarded-For 192.168.0.111
    }
    reverse_proxy /Users/ForgotPassword/Pin 192.168.0.111:8096 {
        header_up X-Forwarded-For 192.168.0.111
    }
    reverse_proxy 192.168.0.111:8096
    tls {
		dns duckdns duckdnstoken
	}
}
jfa-go.duckdns.org {
    reverse_proxy 192.168.0.111:8056
    tls {
		dns duckdns duckdnstoken
	}
}
WordPress Example
sub.yourdomain.com {
    root C:\directory\wheres-your-wordpress-root-is\yourdomain
    php_fastcgi 127.0.0.1:9000
    file_server
    encode gzip
}
Multiple Subdomains
Cloudflare
sub.domain.com {
    reverse_proxy 127.0.0.1:8096
    tls {
        dns cloudflare cloudflare-api
    }
}
sub2.domain.com {
    reverse_proxy 127.0.0.1:5055
    tls {
        dns cloudflare cloudflare-api
    }
}
DuckDNS
subdomain.duckdns.org {
    reverse_proxy 127.0.0.1:8096
}
subdomain2.duckdns.org {
    reverse_proxy 127.0.0.1:5055
}
Note: Save all these configurations as Caddyfile without any file extension.
Running Caddy as a Windows Service
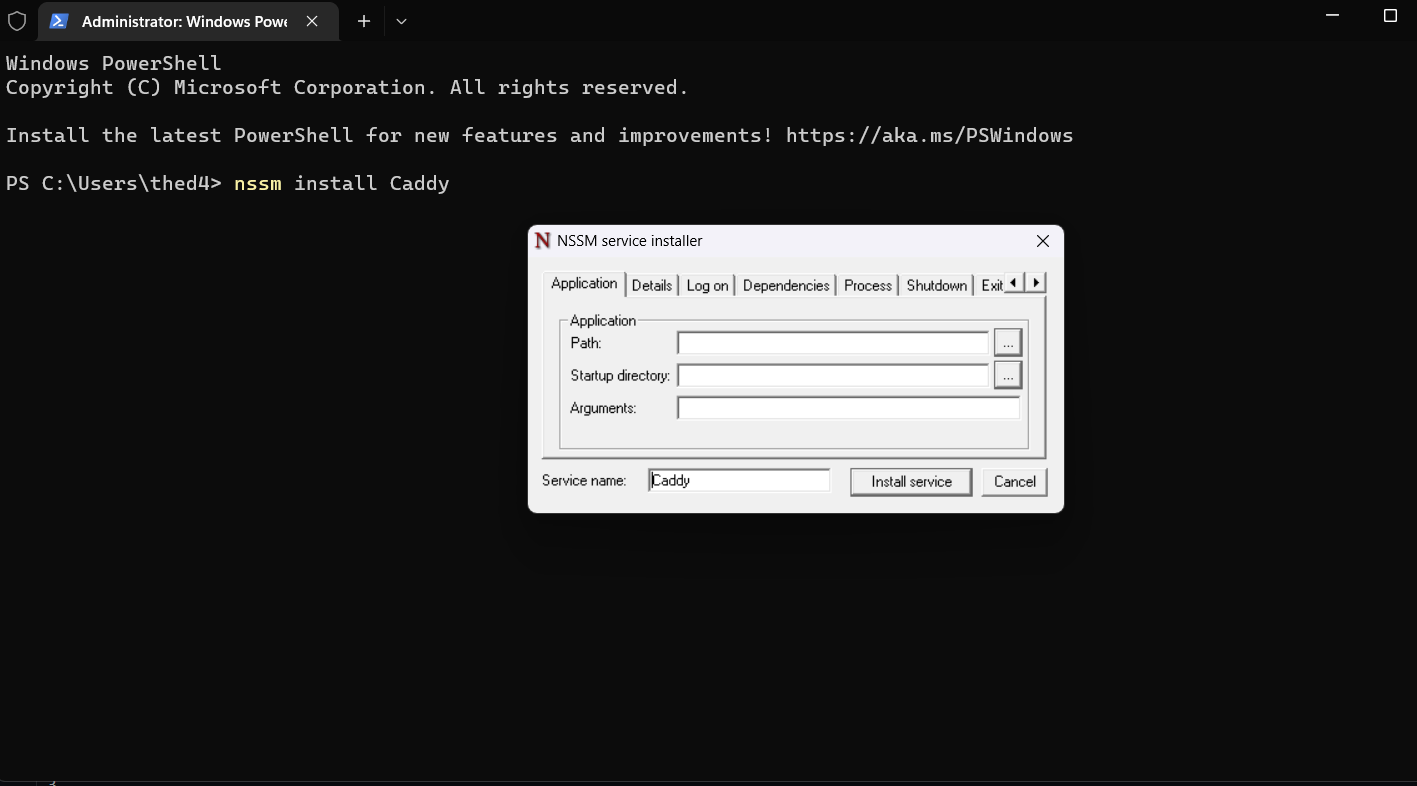
We'll use NSSM (Non-Sucking Service Manager) to run Caddy as a Windows service.
- Download NSSM
- Add both Caddy and NSSM to your Windows environment variables.
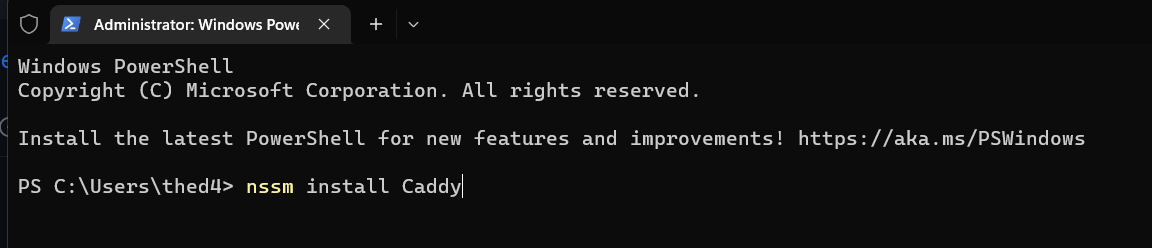
- Open an administrative PowerShell window.
- In the NSSM GUI that appears, configure the following:
- Path: Your Caddy.exe location (e.g.,
C:\Tools\Caddy\caddy.exe) - Startup Directory: Your root Caddy folder (e.g.,
C:\Tools\Caddy) - Arguments:
run --config Caddyfile
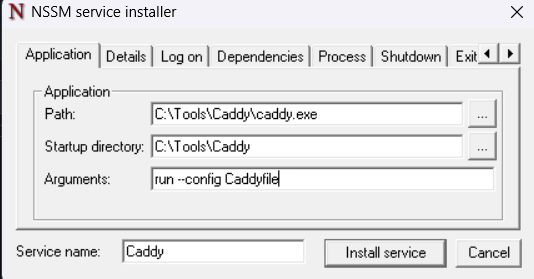
- Click "Install Service"
Start the Caddy service:
nssm start Caddy
Register the Caddy service using NSSM:
nssm install Caddy
Additional NSSM commands:
- Check service status:
nssm status Caddy - Restart service:
nssm restart Caddy - Stop service:
nssm stop Caddy
Conclusion
By following this guide, you should now have Caddy set up as a reverse proxy on your Windows system, either running manually or as a Windows service. Remember to adjust the configurations according to your specific needs and always keep your API keys and tokens secure.